

Table of Contents
Picking an enclosure by its outer measurements alone is one of the most common mistakes in electrical installations. Electrical enclosure size isn’t just about how big the box looks on the wall. It’s about whether everything inside, like breakers, meters, wiring, terminals, actually fits with room to spare.
A box that’s too small crowds the wiring and makes future work harder. One that’s too big wastes wall space and money. Getting electrical box sizes right means thinking about components, heat, access, and what you might need to add later, not just length and width.
Key Takeaways
- Start sizing with the equipment list, not the box catalogue.
- Circuit count, internal clearance, and wiring space all affect the right fit, so measure carefully.
- Heat build-up and mounting environment matter just as much as dimensions, if not more.
- Knowing how to choose the right enclosure size now saves you a costly expansion in the future.
- The right electrical panel box size balances today’s needs with tomorrow’s.
Start with What the Enclosure Needs to House
Before you look at any box, make a list. What’s actually going inside? Things like:
- MCBs or MCCBs (the breakers that protect your circuits)
- Meters
- Terminals and busbars (the metal bars that distribute power to each circuit)
- Contactors
- Wiring accessories
This list decides your electrical enclosure size, not the other way around. Picking a box size first and then squeezing components in almost always backfires.
Each item on your list also needs space around it, not just space for itself. Breakers need room to switch on and off freely. Terminals need room for a screwdriver to reach them.
For example, think of it like packing a suitcase. You don’t just count the items, you also think about how they sit together. A big enough electrical panel box size might look efficient at first, but if it’s tightly packed, it makes every future repair slower and riskier.
A little extra room around each component also helps with airflow, which matters more than people expect once the box has been running for a few months.
Once your component list is ready, add up their combined width and depth. That rough total is your real starting point, well before you check a size chart. Write it down, and keep it handy while you compare options.
How Distribution Box Size Relates to the Number of Circuits
Distribution box size is closely tied to how many circuits, or “ways,” it needs to hold. Each way is one slot for a breaker.
Two things matter here:
- Occupied ways: the breakers you’re installing right now.
- Spare ways: empty slots left for circuits you might add later.
Here’s the trap: choosing the smallest box that fits your current breakers. It looks cost-effective on paper, but it leaves zero room to grow. Add one more circuit next year, and you’re replacing the whole box instead of just adding a breaker.
Meter box size for number of circuits works a little differently, because
- A meter box usually houses one meter rather than a row of breakers.
- Distribution boxes, on the other hand, scale almost directly with circuit count.
A practical example helps to understand this. A small apartment might need 8 to 10 ways for lighting, sockets, and a few appliances. A larger home with an AC, geyser, and kitchen appliances on separate circuits could easily need 16 or more.
A distribution box sized with a few spare ways in mind costs a little more upfront. It saves a lot more down the line, both in money and in the hassle of a mid-renovation box swap.
How Is Meter Box Sizing Different?
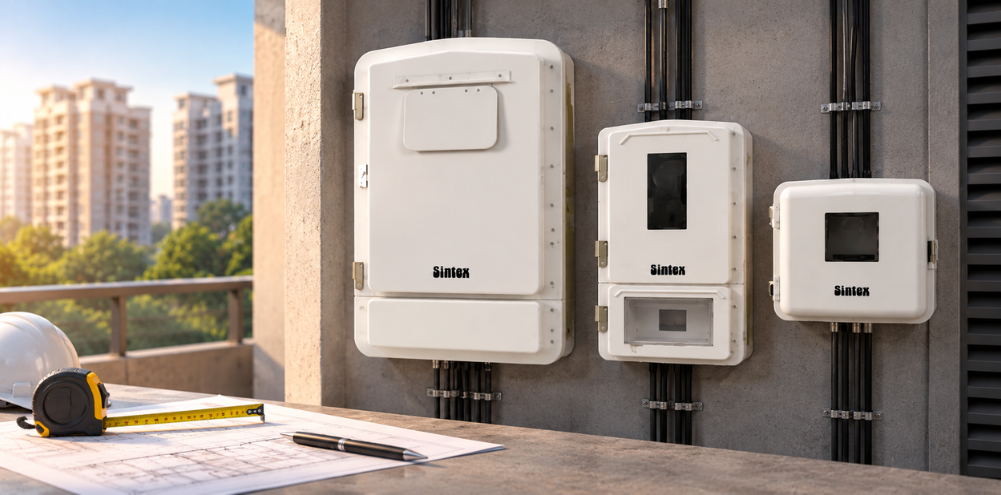
Meter box size doesn’t follow the same logic as a distribution box. It isn’t really about circuit count. Instead, meter box sizing depends on:
- The physical dimensions of the meter itself
- Any service equipment fitted alongside it
- Terminal blocks and cable routing space
- Requirements set by your local utility provider
Many meters also need a fixed amount of clearance around them for sealing, inspection, or utility access. This is one reason electrical box sizes for meters can look larger than you’d expect based on the meter’s size alone.
The extra space isn’t wasted; it’s required.
Utility providers often have their own approved list of box sizes and layouts too. Before finalising a meter box, it’s worth checking whether your local utility has specific requirements, since these can override general sizing assumptions entirely.
Single-phase and three-phase meters also differ in footprint, so the same “one size fits all” thinking that sometimes works for smaller distribution boxes doesn’t really apply here. A three-phase setup, in particular, often needs noticeably more internal room for its extra terminals and connections.
If you’re unsure which meter type your installation uses, check with your utility provider before buying a box to avoid a mismatch later.
Internal Space Matters More Than External Dimensions Alone
Two enclosures can share the same external dimensions and still offer very different usable space inside.
Why? A few reasons:
- Usable depth: some of that depth is taken up by the door, hinges, or mounting rail.
- Door clearance: components can’t sit where the door needs to swing or close.
- Component projection: breakers and terminals stick out further than their listed width suggests.
- Mounting rail thickness: the rail itself eats into the depth you thought you had.
This is why distribution box dimensions on a spec sheet only tell half the story. The external size gets you in the door. The internal, usable electrical enclosure size determines whether your components fit comfortably.
Here’s a quick way to check this: ask for the usable depth figure specifically, not just the overall box depth. If a supplier can’t answer that question directly, or if it’s smaller than what you need. it’s worth digging further before you commit to that model.
Two boxes that look identical on a shelf can behave very differently once you start wiring them, so this internal check is worth the extra ten minutes.
Allow Enough Space for Wiring and Cable Entry
Wiring needs room too, not just the components it connects to. This is one of the most overlooked parts of any electrical enclosure size guide.
Keep these in mind:
- Bend radius: cables can’t turn sharp corners without stress on the insulation.
- Terminal access: you need space to actually tighten a screw, not just squeeze a wire in.
- Cable glands: entry points for incoming and outgoing cables need their own clearance.
- Separation: some cables need to be kept apart from others for safety or interference reasons.
- Labelling space: a little room to mark circuits clearly makes future troubleshooting far easier.
Can you picture trying to fix a fault in a box where every cable is pressed flat against the next one? Probably not, and it isn’t safe either! So, even a simple job turns into an hour of untangling wires just to see what you’re doing.
Skimping on distribution box dimensions here doesn’t save real space. It just makes the box harder to wire correctly, and even harder to maintain once it’s mounted and full. A little extra room around the cable entries pays for itself the first time something needs fixing.
Plan for Heat Dissipation and Ventilation
Every component inside an enclosure gives off some heat. Breakers, contactors, and meters all warm up during normal use.
Electrical enclosure size affects how that heat escapes.
- A bigger enclosure gives heat more room to spread out before it becomes a problem.
- Too small, and heat gets trapped, which can shorten component life or trip breakers unnecessarily.
Think of a crowded room with no windows. It heats up fast, even if nobody’s doing anything unusual. An enclosure works the same way.
That said, bigger isn’t automatically better. An oversized electrical panel box size wastes space without meaningfully improving airflow. The goal is enough volume and ventilation for the heat your specific components will actually generate, not just to buy the biggest box available.
When included, ventilation slots should stay clear of dust and debris. A blocked vent defeats the purpose of leaving that extra space in the first place, so it’s worth checking periodically, not just at installation.
Component placement inside the box also matters. Grouping heat-generating parts too closely together, even in a correctly sized box, can create a hot spot that undermines the benefit of the extra room elsewhere.
How Much Space Should You Keep for Future Expansion?
It’s tempting to size an enclosure for exactly what you need today. Resist that urge. Knowing how to choose the right enclosure size means planning a little ahead, not just for the present. Because eventually down the line:
- Circuits get added
- Meters get upgraded
- New, better equipment needs to be added
Here’s a reasonable rule of thumb: leave 20-25% spare capacity for likely future additions. If you’re fitting eight breakers today, a box with room for ten is a sensible middle ground. However, the space capacity should be planned according to the anticipated loads, future circuits, available configurations and design requirements. An electrician should also confirm the final enclosure size based on your installation’s specific needs.
This also doesn’t mean buying the biggest box “just in case.” Massively oversizing wastes money and wall space, and can even cause the heat and ventilation issues covered earlier.
It’s part of any sensible distribution box size selection guide: planning based on realistic near-term needs, not rough estimates or excess. To do this, figure out what you’re likely to add in the next three to five years:
- A new appliance circuit?
- A solar setup?
- An EV charger?
Make a list and size around that, rather than either extreme. Talking to your electrician about likely future additions, before the box is chosen, often surfaces needs you hadn’t considered on your own.
Also Read: What is a Junction Box Used For? Evaluating Commercial Uses
Indoor vs Outdoor Enclosure Sizing: What Changes?
Where an enclosure lives changes what it needs, beyond just an electrical enclosure size guide.
Outdoor installations typically need:
- Extra sealing against rain and dust
- Cable glands rated for outdoor exposure
- Some allowance for heat build-up in direct sun
- Sturdier mounting for wind or vibration
- A sunshade or canopy in particularly hot regions
IP rating (a measure of how well a box resists dust and water) is also worth checking as supporting detail. Two boxes with the same IP rating can still differ in usable internal space, so don’t let the rating alone decide the purchase.
Electrical box sizes for outdoor use often run slightly larger simply to accommodate this extra sealing and cable protection. An indoor box, sheltered from weather, can usually be a touch more compact for the same components.
If you’re unsure which category your installation falls into, like a shaded, enclosed veranda or covered meter room often still counts as an outdoor-adjacent environment. When in doubt, size for the tougher conditions.
It’s a small extra cost upfront, but far cheaper than dealing with corrosion or water ingress a year or two down the line.
How to Measure an Existing Distribution or Meter Box
Replacing or upgrading a box? Measure the old one properly first. Record these before you shop:
- Height, width, and depth
- Mounting arrangement (surface-mounted or flush/recessed)
- Current component layout inside
- Cable-entry positions
- Available space around the box for a larger replacement
A tape measure and a notepad are all you really need. Write each measurement down as you go, rather than trying to remember them later at the shop. It also helps to take a quick photo of the inside before you disconnect anything. It’s a simple step, but it saves confusion later when you’re trying to remember which wire went where.
Distribution box dimensions on paper mean little if you haven’t checked the actual wall space and meter box size against what’s physically available on site. Walls aren’t always as square or as spacious as they look, especially around older installations.
This measurement avoids a return trip to the shop later, or worse, a box that doesn’t fit once you’ve already opened the wall.
If you’re unsure about any measurement, the advice is the same as before: ask an electrician to double-check before you finalise the purchase. A wrong number here is easy to make and annoying to correct later.
How to Read an Electrical Enclosure Size Chart
Electrical box sizes can look intimidating when you’re comparing different enclosure charts, but they usually follow a simple pattern.
| Column | What It Tells You |
| External dimensions | Overall height, width, depth of the box |
| Usable depth | Actual internal space once the door and mounting rail are accounted for |
| Mounting dimensions | Hole spacing and bracket positions for installation |
| Available variants | Different door types, ways, or IP ratings for the same base size |
Think of the chart like a menu; not every item might matter to you based on what you like. It’s no different here. Focus on the configuration information relevant to your installation.
- If you’re mounting on a flat wall, mounting dimensions matter a lot.
- If you’re squeezing a box into a tight recess, watch usable depth closely.
The mistake most people make with an electrical enclosure size chart is stopping at the external dimensions. It’s the biggest, boldest number on the page, so it’s an easy one to fixate on.
Always check usable depth too, not just electrical box sizes. That number, not the outer size, tells you what will actually fit inside. If a chart doesn’t list usable depth directly, ask the supplier for it before you buy, rather than assuming it’s close enough to the external figure.
Distribution Box vs Meter Box: Different Sizing Priorities
These two box types get sized around very different things.
| Factor | Distribution Box | Meter Box |
| Primary driver | Number of circuits (ways) | Meter dimensions |
| Cable routing | Multiple outgoing circuits | Incoming supply and utility cabling |
| Terminals | Per-circuit breaker terminals | Meter and service terminals |
| Spare capacity | For future circuits | For future meter upgrades |
| Application | Powering household or commercial loads | Housing and protecting the meter itself |
In short:
- Distribution box size planning starts with circuit count.
- Meter box size planning starts with the meter and what the utility requires around it.
Treating the two the same way is a common, avoidable mistake. Someone used to sizing distribution boxes might assume a meter box needs a similar spare-capacity buffer for “extra circuits,” when really it just needs to match the meter and any utility-mandated clearance.
In many installations, both boxes sit side by side, but they’re sized through completely separate logic. Keeping that distinction clear from the start makes the whole selection process faster and less confusing.
It also helps when talking to a supplier. Asking specifically about circuit capacity for a distribution box, or meter clearance for a meter box, gets you a far more useful answer than a general size query.
Also Read: Why Electricity Boards in India Consider SMC Enclosures over Metal Sheet Boxes?
Common Enclosure Sizing Mistakes to Avoid
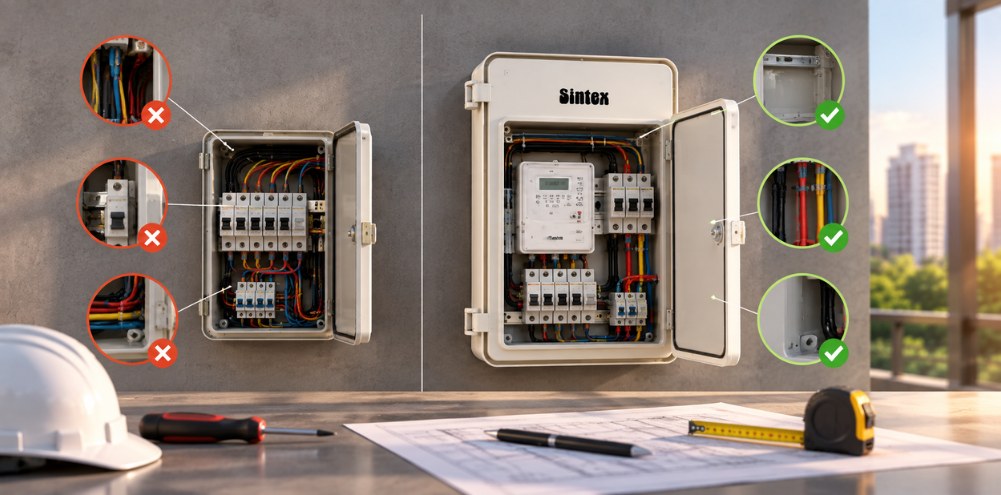
A few habits cause most sizing headaches:
- Choosing by external dimensions only, without checking usable internal space.
- Ignoring cable space, leaving no room for bend radius or glands.
- Fitting exactly enough circuit capacity, with zero room to grow.
- Overlooking heat, especially in smaller or enclosed spaces.
- Skipping depth, focusing only on height and width.
- Assuming same nominal size means same fit, across different brands or models.
- Forgetting maintenance access, sizing for installation day only.
Most of these mistakes share one root cause: rushing the distribution box size decision to get to installation faster. It’s an understandable shortcut, but it rarely saves time overall.
Electrical enclosure size mistakes don’t show up after install. They show up months later, when you’re trying to add a circuit or fix a fault in a box that’s already packed tight. By then, fixing the problem usually means buying a second box, not just adding one breaker.
A short checklist before purchase, covered in the next section, catches almost all of these before they become a real problem.
How to Choose the Right Enclosure Size: A Practical Checklist
Bring everything together with this checklist before you buy:
- List every component that needs to go inside.
- Count your circuits, current and realistically expected future ones.
- Check each component’s actual dimensions, not just its rated size.
- Confirm wiring and cable-entry space, including bend radius.
- Check usable depth, not just external dimensions.
- Consider heat load and ventilation needs.
- Match the enclosure to its indoor or outdoor environment.
- Leave room for maintenance access, not just installation.
- Add reasonable spare capacity for future expansion.
- Confirm mounting arrangement suits the available wall space.
This list looks long, but most steps take a minute or two once your component list is ready. The bulk of the work happens when you first write down what needs to go inside; everything else is not that time-consuming.
Treat it like a pre-flight check, not a chore. Skipping even one or two items is exactly how common mistakes happen in the first place.
Knowing how to choose distribution box size, or any enclosure size, really comes down to working through this list once, properly, rather than sizing by feel and adjusting later. Print it out or save it on your phone, and run through it every time you’re sizing a new box, not just the first one.
Choosing the Right Sintex Distribution or Meter Box
Sintex manufactures SMC distribution and meter boxes built for Indian conditions, weatherproof, shockproof, and resistant to tampering.
Our meter boxes use a single-piece moulded design with concealed metal hinges and internal mounting screws, so components stay protected and hard to tamper with. They’re built with enough internal space for the meter, cut-outs, and cabling, and are available across configurations for water, electricity, and gas metering.
This single-piece construction matters more than it might sound. Fewer joints mean fewer weak points where water or dust could eventually get in, which is especially useful for outdoor-mounted boxes.
Rather than guessing a meter box or distribution box size, follow this process:
- Compare Sintex’s available configurations against your actual component list and circuit count.
- Line up your list against the specifications for each model you’re considering.
- Then, check the official Sintex product specifications for the exact model you’re considering to confirm it fits your installation, rather than relying on general product photos or size ranges alone.
Conclusion
The right electrical enclosure size is never just the smallest box that technically fits. It’s one with enough room for your components, wiring, heat load, and a bit of breathing space for whatever gets added next.
A box chosen this way rarely needs revisiting. One chosen purely by external dimensions almost always does, usually sooner than expected.
Getting electrical box sizes right the first time costs a little more thought upfront. It saves far more time and hassle down the line, whether that’s an easier repair next year or simply not needing to replace the whole box.
Yes. An oversized enclosure wastes wall space and cost without adding real benefit. It can also make wiring look messy and harder to trace, since components sit far apart with loose cable runs between them. The goal is enough room for components, wiring, and heat, not the biggest box available.
If the distribution box is too small, wiring gets cramped, heat has nowhere to escape, and there's no room to add circuits later. Maintenance becomes harder too, since there's barely space to work with a screwdriver inside. A too-small box often needs replacing sooner than expected, costing more overall than sizing it correctly the first time.
A common guideline is 20-25% spare capacity, enough for realistic near-term additions without paying for space you'll never use. The right number depends on how likely you are to add circuits, meters, or equipment like an EV charger in the next few years.
Yes, significantly. Components project further than their listed width suggests, and shallow enclosures can leave no room to close the door properly. Distribution box dimensions should always be checked in all three directions, not just height and width, before you commit to a purchase.
Incoming cables need bend radius, gland clearance, and separation from other wiring. Skipping this space during sizing often forces cables into tight bends, which stresses the insulation and complicates future maintenance; it can even require a full rewire to fix properly.
Often, yes. Outdoor enclosures typically need extra space for sealing, weatherproof cable glands, and heat management in direct sun. IP rating matters too, but sizing should account for these physical additions, not just the rating number printed on the box itself.
Usually, as long as wall space and mounting arrangement allow it. Measure the existing box's dimensions and the surrounding space first, then check that your new enclosure's mounting holes and cable entries suit the existing wiring layout before finalising your choice.
Sintex offers distribution boxes across a range of configurations for different circuit counts and applications. The most reliable way to confirm which size suits your current and future circuit needs is to check the specific model's official specification, rather than relying on general listings.
Start with your meter's physical dimensions and any utility-specified clearance requirements, then compare against Sintex's available meter box configurations. Matching the box to your meter type and application, rather than picking by appearance, gives you the most reliable fit for your installation.
Sintex publishes product-specific details for its distribution and meter boxes through official documentation on the product pages. Checking these directly, rather than estimating from photos or third-party listings, is the most reliable way to confirm exact dimensions before you buy.